How to Export iMovie: The Complete Guide to Saving Your Video

Edited by
Ben Jacklin
23,456

You've finished editing your video in iMovie. Now you want to save it – but you can't find an Export button anywhere. Instead, you see Share, Send, Save to Photos, and a handful of other options that don't quite match what you're looking for. If that sounds familiar, you're not alone. The confusion around how to export iMovie is one of the most common frustrations users run into, and it's almost entirely a UX problem: Apple simply calls the export function something different from what most people expect.

This guide walks you through everything – where the button actually is, how to save iMovie on Mac and iPhone, how to export iMovie to MP4, and what to do when iMovie won't export at all.

Where is the Export button in iMovie?

Here's the short answer: there is no button labeled Export in iMovie. Apple replaced it with a Share button – a square icon with an arrow pointing upward. Once you know that, everything else becomes much clearer.

On Mac:

Look at the top-right corner of the iMovie window, just above the preview player. You'll see a box-with-arrow icon – that's your Share button. You can also reach it through the menu bar: File → Share.

On iPhone and iPad:

Open your project, then tap Done in the top-left corner to exit the editing timeline and return to the project view. At the bottom of the screen, you'll find a toolbar. The Share button is the same arrow-in-a-box icon – tap it to see your export options.

If you're on iPhone and the Share button isn't showing up, make sure you've tapped Done first. The export options only appear in the project view, not while you're actively editing on the timeline.

One more thing worth knowing before we get into steps: when people search for how to export from iMovie, how to save iMovie, or imovie export video – they're all asking about the same action. In Apple's terminology, it's always Share.

Step-by-step export process for Mac, iPhone, and iPad

How to Export iMovie on Mac

  1. Open your project in iMovie
  2. Click the Share button (↑) in the top-right corner, or go to File → Share
  3. Select File… from the dropdown – this saves your video as a file on your computer
  4. A settings window will appear. Configure the following:

  • Resolution: 1080p for most uses; 4K if you shot in 4K
  • Quality: High or Best (Best is recommended unless storage is tight)
  • Compress: Choose Better Quality for archiving, Faster for quick sharing

5. Click Next, choose a destination folder, name your file

6. Click Save

iMovie will render and export the video. Depending on the length and quality settings, this can take anywhere from a few seconds to several minutes.

How to save iMovie on iPhone­­ / iPad

  1. Open your project, then tap Done (top-left corner) to return to the project overview
  2. Tap the Share button (↑) at the bottom of the screen
  3. Choose Save Video – this saves the finished video directly to your Photos app (camera roll)
  4. Select your preferred resolution: 360p, 540p, 720p, or 1080p

That's the answer to both how to save iMovie to camera roll and how to save iMovie to photos – it's the same action: Share → Save Video.

You can also tap AirDrop, Files, or any other app in the Share sheet to send the video elsewhere directly.

How to export iMovie to YouTube

On both Mac and iPhone, iMovie lets you upload directly to YouTube without saving a local file first:

  • Click or tap Share, then select YouTube
  • Sign in to your Google account if prompted
  • Add a title, description, and privacy setting
  • Tap Share or Next to begin the upload

This covers how to export iMovie to YouTube and how to save iMovie YouTube in one step – no separate file needed.

Best export formats for different platforms

When you export iMovie to a file, the format and resolution you choose should match where the video is going. Here's a practical breakdown:

YouTube and Vimeo
Export at 1080p (or 4K if available), quality set to Best. iMovie encodes in H.264 or HEVC – both are fully supported by YouTube. No conversion needed.

Instagram Reels and TikTok
These platforms use vertical video. If you shot on iPhone in portrait mode, iMovie preserves the orientation – this covers imovie export vertical video without any extra steps. Export at 1080p, quality High.

WhatsApp and messaging apps
For sending via messaging, 720p at standard quality keeps the file size manageable while still looking good on mobile screens.

Personal archive
Always go Best Quality at the highest available resolution. You can always compress a file later – you can never recover quality that was lost during export.

How to Save iMovie as MP4 (Instead of MOV)

By default, iMovie exports video in the .mov container. If you specifically need to save iMovie as MP4 or export iMovie to MP4, here are two reliable approaches:

Option 1 – Via QuickTime Player (Mac):
After exporting the .mov file, open it in QuickTime Player. Go to File → Export As → 1080p (or your preferred resolution). QuickTime will save a new copy in .mp4 format.

Option 2 – Encode via Finder (Mac):
Right-click the .mov file in Finder → Encode Selected Video Files → choose format and quality. The output will be .m4v or .mp4.

On iPhone, videos saved to Photos are already in a compatible H.264 format that most platforms accept natively – the container is usually .mov, but the codec is universally playable.

Why iMovie calls exporting something else

If you've ever googled "export iMovie" and then stared at the interface confused, you've bumped into an intentional Apple design decision.

Apple replaced the word Export with Share across iMovie (and many other Apple apps) to reflect a particular philosophy: you're not just saving a file, you're sending your creation somewhere – to a platform, a device, a person. The full Share menu maps out like this:

What you see

What it actually does

File…

Saves a video file to your Mac

YouTube

Uploads directly to YouTube

The confusion is real and widespread. Whether you're searching for how to export imovie project, imovie export mp4, export from imovie, or how to share imovie project – every single one of those actions lives under that one Share button. Once you've internalized that, the interface becomes much easier to navigate.

How to save an iMovie project (not just the final video)

There's an important distinction that trips up a lot of users: saving a project (the editable file with all your clips and edits) is completely different from exporting the final video.

The good news: iMovie saves your project automatically and continuously. Every cut, title change, and transition is written to your project file in real time. There is no Save button, because there's no need for one – iMovie handles it for you.

To back up or duplicate a project on Mac:

  • In the Projects view, right-click your project → Duplicate Project
  • Or go to File → Move to Library to move it to a different iMovie library

To find your project files manually:
iMovie projects are stored inside your iMovie Library file, located by default at: ~/Movies/iMovie Library.imovielibrary

You can copy this file like any other to an external drive or backup location.

On iPhone: Projects are stored inside the iMovie app and cannot be exported as editable files. Only the finished video can be shared. If you want to save imovie project in a portable format on iOS, your only option is to export the finished video through Share → Save Video.

When Imovie won’t export: Common fixes

If your imovie export failed or the export gets stuck, work through these fixes in order:

  1. Restart iMovie – close the app completely and reopen it. This resolves a surprising number of export failures
  2. Check available disk space – iMovie needs free space roughly 2–3× the size of your project to render the output file
  3. Lower the resolution – try exporting at 720p instead of 1080p; if that works, the issue is likely a hardware resource problem
  4. Delete render files – on Mac, go to Preferences → Delete Render Files, then try exporting again
  5. Create a new project – copy your clips into a fresh project and export from there; this often bypasses corruption issues
  6. Update your OS – export bugs are frequently fixed in macOS and iOS updates

If none of those work, try exporting sections of your project separately to identify whether a specific clip is causing the problem.

The core issue with iMovie isn't that it lacks features – it's that the interface buries things under non-obvious labels, and the export process involves more guesswork than it should. For casual users who just need to get a video out quickly, that friction adds up.

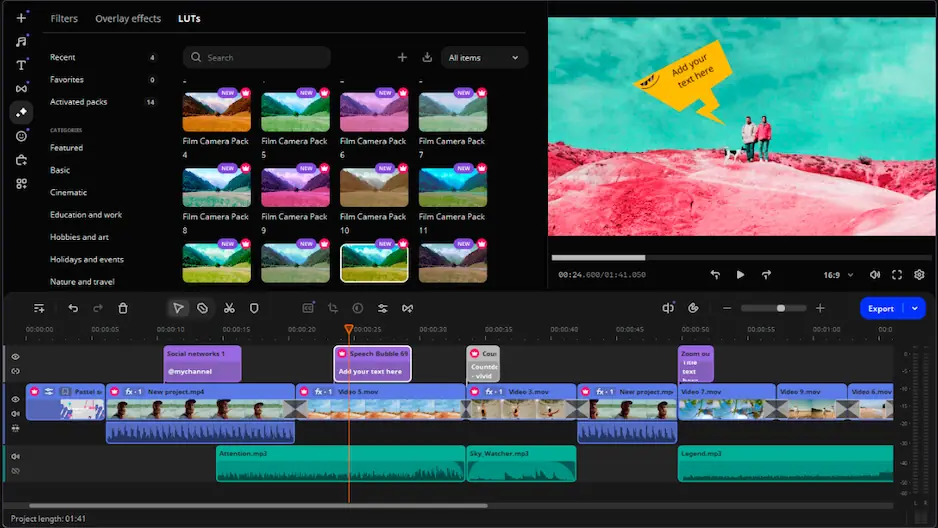
If you'd prefer a video editor where Export means Export – where the button says what it does, format options are front and center, and you're not hunting through Share menus – Movavi Video Editor is worth a look.

Movavi is a desktop-first tool for Windows and macOS. It works fully offline, gives you clear control over output format and quality at export time, and doesn't require an Apple ecosystem to run. The interface was designed for people who want results without a learning curve.


Have questions?
If you can’t find the answer to your question, please feel free to contact our Support Team.
Join us for discounts, editing tips, and content ideas

1.5M+ users already subscribed to our newsletter

By signing up, I agree to receive marketing emails from Movavi and agree to Movavi's Privacy Policy.