Clipchamp Free Export Resolution: 1080p Limits & Fixes

Edited by
Ben Jacklin
6,533

Choosing the right export setting can make the difference between a crisp, professional video and a blurry, downscaled one. This guide breaks down everything you need to know about Clipchamp's export options, with a close look at the Clipchamp free plan export resolution and how it compares to the paid tier.

Reasons your video won't export at full resolution

Your subscription tier is only one part of the story. Yes, the Clipchamp free export resolution limit caps output at Full HD, but if your video looks softer than expected even at 1080p, several other culprits are usually at play. Working through them one by one will save you from assuming an upgrade is the only fix.

Start with your source footage. Clipchamp exports at the quality of what you put on the timeline, and it won't upscale. GoPro and phone recordings often use the HEVC/H.265 codec, which can cause compatibility issues, along with high-resolution formats that are too large for Clipchamp to handle smoothly. Converting clips to H.264 MP4 before importing keeps detail intact.

System resources matter just as much. High-resolution exports require more resources, so if 1080p stalls, dropping to 720p, checking storage space, and closing other heavy programs can help. In the browser, avoid surfing in other tabs while exporting, since your browser can de-prioritize the process and cause it to slow down or stop. A stale cache or outdated Chrome or Edge is another common cause.

Sometimes the problem shows up as a missing picture or sound rather than a resolution drop. Audio tracks may not stay aligned after splitting a clip, and re-importing the audio and confirming its position on the timeline usually resolves it.

Finally, try disabling hardware acceleration in the export settings, which frequently clears stubborn failures at the cost of a slower render.

Settings for exporting in 1080p

Once your edit is finished, exporting your video takes only a couple of clicks. Click the Export button in the top-right corner, then select the desired video resolution, and Clipchamp automatically starts exporting. There's no separate save dialog to wrestle with; the file downloads once processing wraps up.

The resolution menu is where the choice happens. You'll see options ranging from 480p up to 1080p, with the 4K entry reserved for Premium accounts. For a Clipchamp’s free plan 1080p export, simply pick the 1080p (Full HD) setting, which is the highest quality available without a subscription.

To get the sharpest result, make sure your timeline media is at least 1080p to begin with. The editor never adds detail that wasn't there, so a 720p clip stretched to fill the frame will still look soft even when the export setting reads Full HD.

After export, preview the finished file before uploading anywhere. A quick playback confirms the picture and sound came through cleanly, sparing you a re-export later.

Settings for exporting in 4K

Stepping up to Ultra HD changes the picture entirely. 4K exports are available only to paid Clipchamp Premium users. The 4K entry still appears in the resolution menu for everyone, but selecting it prompts free accounts to upgrade before the render can begin.

Unlocking it is a matter of access rather than settings. 4K export is gated behind premium, either through a standalone Premium subscription or any Microsoft 365 Personal or Family plan. If you already pay for Microsoft 365, the feature is likely included at no extra cost, so it's worth checking your account before subscribing separately.

Once you're on a qualifying plan, the workflow mirrors a standard export. Clipchamp Premium subscribers can export in ultra-high definition at 3840p resolution and 70 Mbps, giving you noticeably crisper footage and richer bitrate for demanding projects.

Reserve 4K for content that genuinely benefits, such as YouTube uploads, product showcases, or cinematic work. For social clips that platforms compress anyway, the larger files rarely justify the longer render times.

Free vs. Premium: How resolution compares

The gap between tiers comes down to a single ceiling. The Clipchamp free version export resolution stands at 1080p, while Premium lifts that to true 4K. Everything else about the export process, from the menu to the file format, stays the same across both plans; only the top resolution changes.

That makes the decision refreshingly simple. Since TikTok, Instagram Reels, and YouTube Shorts all cap at 1080p, the free plan suits most social creators, while Premium earns its keep for YouTubers and marketers who need native 4K. Match the plan to where your videos will actually be watched.

Exporting at any resolution with Movavi Video Editor

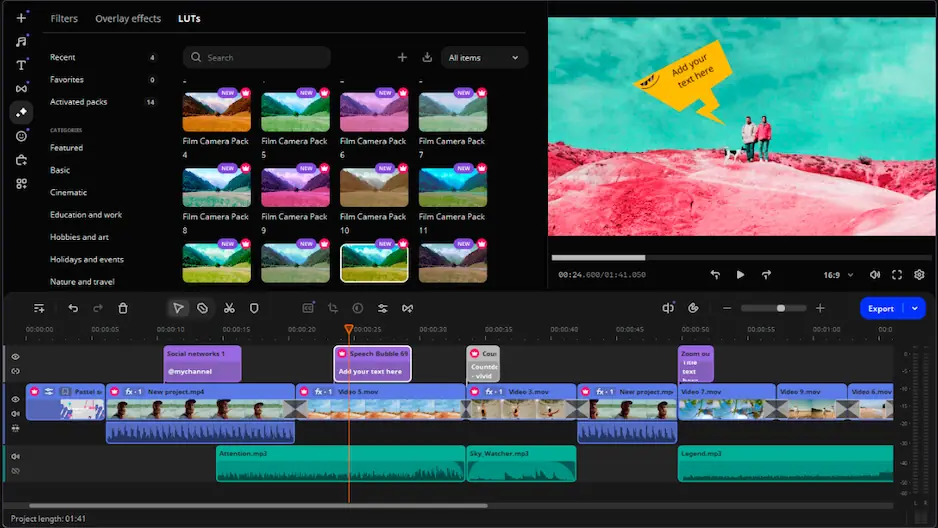
Movavi Video Editor is a desktop app for Windows and macOS computers that handles the full workflow, and crucially, its export menu isn't limited to Full HD. Movavi Video Editor exports finished projects in MP4, MOV, AVI, and other formats, with dedicated presets for YouTube, Vimeo, and smart TVs, plus native 4K support, so your resolution matches your source.

One caveat worth knowing upfront: the 7-day free trial adds a watermark to exports and caps clips at 60 seconds. Full-length, watermark-free 4K output requires a paid subscription that removes the limits entirely.

Have questions?
If you can’t find the answer to your question, please feel free to contact our Support Team.
Join us for discounts, editing tips, and content ideas

1.5M+ users already subscribed to our newsletter

By signing up, I agree to receive marketing emails from Movavi and agree to Movavi's Privacy Policy.